Why Scrapbooking Is a Wonderful Way to Preserve Memories
In a digital age where most of our photos and memories are stored on our phones and computers, there’s something incredibly special about creating a physical scrapbook. Scrapbooking allows you to not only preserve memories but also to express your creativity in a tangible way. Each page tells a story, filled with photos, mementos, and personal touches that bring your cherished moments to life. Whether you’re a seasoned scrapbooker or just starting out, this blog will guide you through the process of creating beautiful, personalized scrapbooks that will be treasured for years to come.
Section 1: Choosing Your Theme and Materials
The first step in scrapbooking is choosing a theme for your project. A theme helps to tie your pages together and gives you direction when selecting photos, papers, and embellishments.
- Picking a Theme: Your theme could revolve around a specific event like a wedding, vacation, or birthday. Alternatively, you might choose a broader theme like family, friendship, or a year-in-review. Once you’ve decided on a theme, gather your photos and think about the story you want to tell.
- Selecting Materials: Scrapbooking involves a variety of materials, including paper, stickers, and embellishments. When selecting your materials, consider how they complement your theme. For example, for a travel-themed scrapbook, you might choose papers with maps, vintage postcards, or airplane motifs. Here’s a list of basic materials you’ll need:
- Scrapbook Album: Choose a size that works for your project. Common sizes include 12×12 inches, 8×8 inches, and 6×6 inches.
- Scrapbooking Paper: Patterned and solid-colored papers that match your theme.
- Photos: Print out the photos you want to include in your scrapbook.
- Adhesive: Double-sided tape, glue sticks, or adhesive dots to attach photos and paper.
- Scissors and Cutting Tools: Regular scissors, decorative-edge scissors, and a paper trimmer.
- Embellishments: Stickers, washi tape, ribbon, buttons, and other decorative elements.
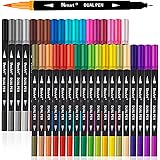
- Pens and Markers: For writing captions, journaling, and adding personal touches.
Pro Tip: Consider using acid-free and lignin-free materials to ensure your scrapbook lasts for many years without fading or deteriorating.
Section 2: Layout and Design Tips
The layout of your scrapbook pages is crucial in telling your story. A well-thought-out layout guides the viewer’s eye through the page and highlights the most important elements.
- Planning Your Layout: Before gluing anything down, it’s a good idea to plan your layout. Arrange your photos and embellishments on the page without adhesive to see how everything fits together. Consider the balance and flow of the page—do you want a symmetrical layout, or something more dynamic and freeform?
- Using Layers and Matting: Layering is a key design element in scrapbooking. You can layer papers, photos, and embellishments to add depth and interest to your pages. Matting your photos with a contrasting paper can make them stand out more. For example, if you have a dark photo, try matting it with a light-colored paper to create contrast.
- Incorporating Journaling: Journaling is an important part of scrapbooking as it allows you to add context and personal reflections to your pages. You can write directly on the page, on a separate piece of paper, or even use pre-made journaling cards. Don’t worry about being a perfect writer—what matters most is capturing your thoughts and feelings.
Step-by-Step Guide: Creating a Balanced Layout
- Materials Needed:
- Scrapbooking album
- Photos
- Scrapbooking paper
- Adhesive
- Scissors
- Embellishments
- Instructions:
- Start by selecting one or two photos for your page. Consider how they relate to each other and the story you want to tell.
- Choose a background paper that complements your photos. If the background is busy, consider using a solid-colored mat behind the photos to help them stand out.
- Arrange the photos on the page, leaving space for journaling and embellishments.
- Add a title or heading to your page using stickers, stamps, or hand lettering.
- Once you’re happy with the layout, start adhering the photos, papers, and embellishments in place.
- Finish the page by adding journaling and any final touches.
This process will help you create pages that are visually appealing and well-balanced, making your memories shine.
Section 3: Advanced Techniques
Once you’re comfortable with the basics, you can start experimenting with more advanced scrapbooking techniques to take your pages to the next level.
- Stamping and Embossing: Stamps are a great way to add custom designs and textures to your scrapbook pages. You can use ink stamps to create patterns, borders, or titles. Embossing, on the other hand, adds a raised texture to your designs. Simply stamp your design, sprinkle embossing powder over it, and use a heat gun to melt the powder for a raised, glossy finish.
- Die Cutting: Die-cutting machines allow you to cut intricate shapes and letters from paper, cardstock, or other materials. This is a great way to create custom embellishments or titles that match your theme perfectly. Many scrapbooking stores offer pre-made die cuts if you don’t have your own machine.
- Mixed Media Techniques: For a more artistic approach, try incorporating mixed media techniques into your scrapbooking. You can use watercolors, acrylic paints, or pastels to create custom backgrounds or accents. Layering different textures, like fabric, lace, or burlap, can also add a unique touch to your pages.
Featured Technique: Heat Embossing for Beginners
- Materials Needed:
- Embossing ink pad
- Stamps
- Embossing powder
- Heat gun
- Scrapbooking paper
- Instructions:
- Start by choosing a stamp that you’d like to emboss. Press it onto the embossing ink pad to coat the stamp with ink.
- Stamp the image onto your scrapbooking paper.
- Immediately sprinkle embossing powder over the stamped image, making sure it covers the entire design.
- Gently tap off the excess powder, then use a heat gun to melt the powder. You’ll see the powder turn into a raised, shiny texture as it melts.
- Let it cool for a few seconds, and your embossed design is ready!
This technique adds a beautiful, professional-looking detail to your scrapbook pages and is sure to impress.
Conclusion:
Scrapbooking is more than just a craft; it’s a way to preserve your memories in a creative and personal way. Each page you create is a reflection of your unique perspective, filled with photos, stories, and artistic touches that bring your memories to life. Whether you’re documenting a special occasion or just capturing everyday moments, scrapbooking allows you to hold onto those memories in a tangible form. So, gather your supplies, choose your theme, and start creating scrapbooks that you and your loved ones will cherish for years to come.


